New York

DIY: Plus Size Shorts

May 25, 2012

I don’t know about you–but I HATE trying to find the perfect pair of shorts! Today, I was near Time Square area and decided to head to the Forever 21 store there–they are the only Manhattan Forever 21 (that I know of) that carries the Plus Size line. It was a very gross and muggy day today, so I figured I would try on some shorts to add to my summer wardrobe.

I tried on 5 different pairs and all were pretty bad–either too short, or too low rise, or too long, or too gaudy…. It was really depressing.

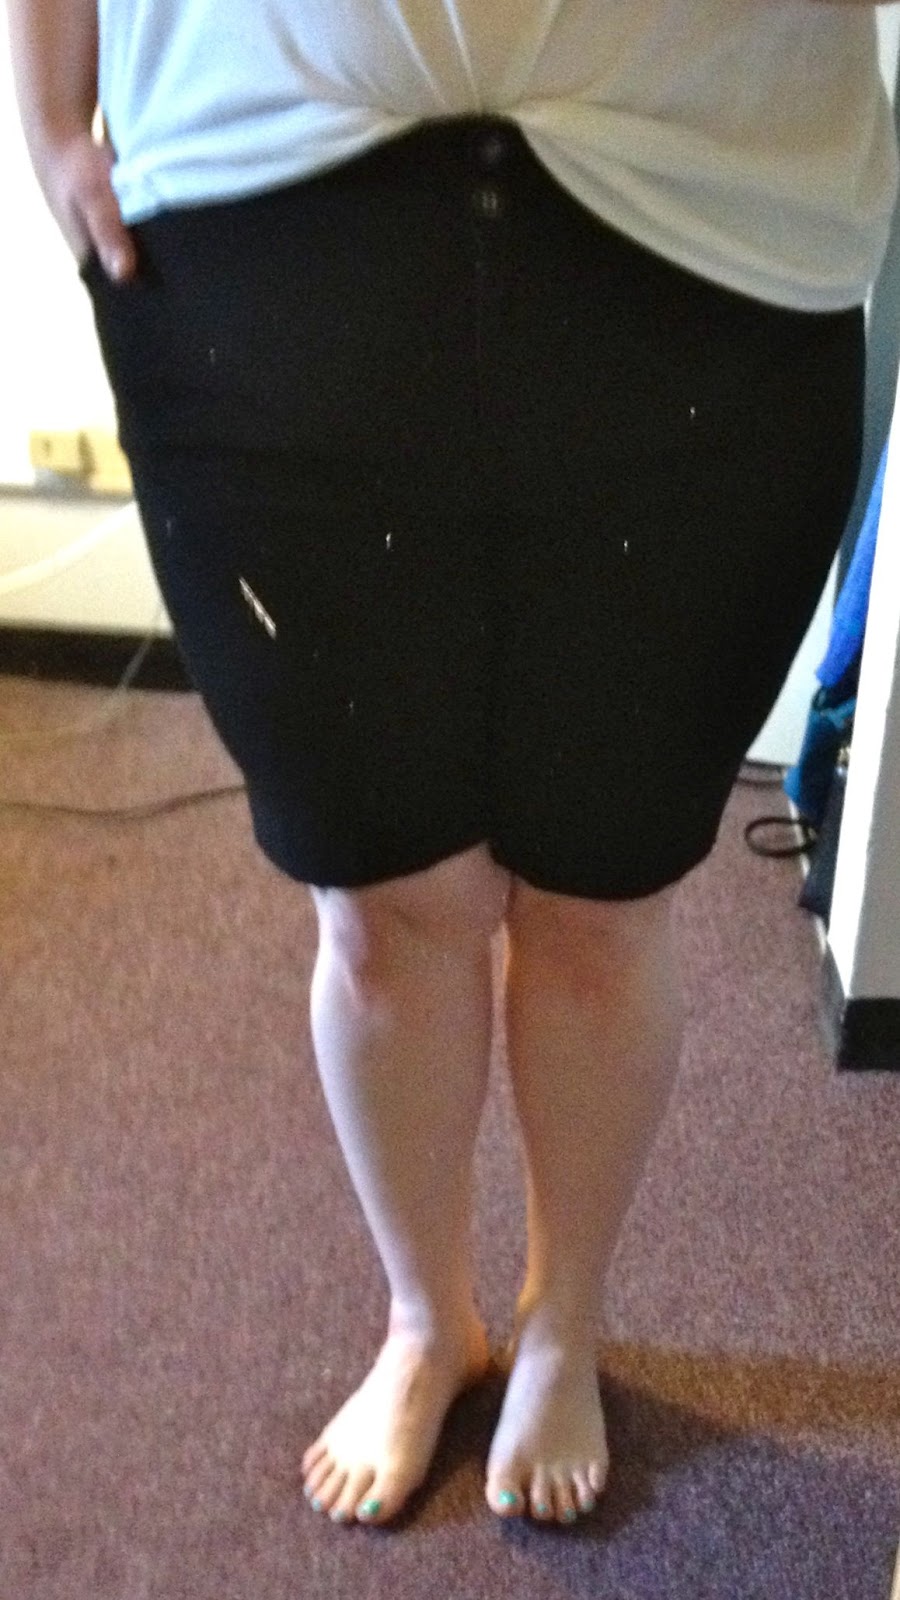
This is a picture of one of the pairs I tried on.   (Funny–look at my eyes, they’re cross eyed!!!) This disappointing shopping trip gave me an idea. I would just make them for myself instead of going on a wild good chase looking for the perfect pair! Here is simple DIY I want to share with you!

* * *

DIY: Plus Size Shorts
Supplies:
1 pair of Pants
1 Piece of Chalk or Tailors Chalk
1 Ruler
1 Pair of Scissors 
 
1.  Find a pair of old pants that you no longer like the leg shape of. They can come from your closet, a clothing store, or a thrift store. They can be jeans, slacks, whatever you want to use! The pant should have a good fit on the waist and hips.  

I love shorts that are made from Slacks, so I used this pair of Style & Co. Capri pants I bought from the local Salvation Army.


2.   Put on your pair of pants and get a piece of CHALK.

3.  Figure out what length you want your shorts to be.  Put a little mark on one of the pant legs where your hem/cut line will go.

4.  Take the pants off. Lay them flat on the ground or on a flat surface.

5.  Place the ruler horizontally, underneath the chalk mark you just made.  Using the ruler as a guide, draw a chalk line extending to the inseam of the pant leg.

6.  Take your ruler and measure the distance from the line you drew to the hem of the pants.

7.  Using this measurement (mine was 15 inches), go to the other pant leg and measure up to that point on that leg. Mark it with your chalk.

8.  Take your ruler again and place it horizontally on the second pant leg below the new mark. Draw a straight line across extending to the inseam (as you previously did with the other pant leg).


Your pant should now look something like this:

9.   When you are settled on the length of your shorts and your lines are drawn, you’re ready to cut!

10.  Take your scissors and cut along the chalk lines on both pant legs.

11.  Now that the pant legs are cut,  fold the short in half to make sure the leg lengths match.

12.   If both legs match in length, you’re good to go! If one is off, trim accordingly.

13.  NOW, put your shorts on to test how they look!

Please Note: This DIY short is meant to have a ragged hem. After each washing they will get more of that ragged look. The chalk should wipe off with a wet cloth or when you next wash your new shorts! Enjoy!

Memorial Day Weekend + New Shop Items!

May 24, 2012

It is hard to believe, but this weekend is Memorial Day Weekend–the unofficial start of summer and all things associated with summer! It will be nice to order an iced coffee and not get funny stares because it’s cold outside. (It has to be crazy freezing for me to drink a hot coffee drink! I am an iced coffee fiend!)

I have to admit though, I am NOT looking forward to the humid nasty New York summer heading my way! I grew up in California my whole life, with dry heat and mild seasons. It can be hard to adapt! I already have my air conditioner installed–that’s how weather wimpy I am!

In celebration of Memorial Day Weekend, I am offering a 15% off Coupon Code to use on ALL items in The Curvy Elle Shop!!! Use coupon code MEMORIAL15  at checkout. This will be good now through Monday, May 28, 2012.

I finally (kind of) got the hang of taking self portrait pictures. I was able to photograph TWO dresses this morning before it started to torrential downpour. I am (slowly) adding some new items to store. I will be adding more items in the next couple of days (weather permitting) in time for the sale. Here are a few items I recently added!

* * *


This is 1980’s era printed Georgette dress. It features a gathered waist, 3/4 puff sleeves, shoulder pads, and 3 covered buttons on the left shoulder detail. This is a cute and comfortable dress. It is very flattering for many body types with the gathered waist and full skirt.  

Think this dress might be a match for you? You can find the measurements at the store. I ‘m asking $30.00 (Plus Shipping).

* * *


This dress features a square neckline, puff 3/4 length with a 1″ cuff, a gathered waist with elastic, a belt, and a full skirt. This is a great work or casual dress. It is comfortable and easy to wear. The fit of this dress makes it work for all kinds of body types. I am asking $30.00 (Plus Shipping) for this fabulous dress!


* * *


This dress has a gathered waist which extends significantly with the added benefit of a full skirt. The fabric is a cotton/polyester jersey knit–which gives added stretch and comfort. It also features shoulder pads, front and back bodice yoke, long sleeves, side seam pockets, and a 3 button center back detail. 

This is a great dress to wear on a picnic or sight seeing on a vacation. It is comfortable and stylish. You can just put it on and the dress speaks for itself! Can you see yourself in it? I’m asking only $30.00 (Plus Shipping)!

* * *
The above prices are BEFORE the 15% of Memorial Day Weekend Coupon Code! Remember to use coupon code MEMORIAL15  at checkout. This will be good now through Monday, May 28, 2012.

All rights reserved © 2012-2017 The Curvy Elle & Laurel Teixeira · Theme by Blogmilk + Coded by Brandi Bernoskie